LLM fine-tune/deploy demo
smolLMv3 on HuggingFace step-by-step

DEMO. ANALYZE. DOCUMENT. REPEAT.
Goals of this Substack QS
This substack QS (quick start) describes (very briefly) the steps we (myself and Copilot) used to
Fine-tune a HuggingFace (HF) model smolLMv3.
Deploy the model to HF.
Deploy Gradio (UI) script to HF.
It took one day to create the demo code and test successfully. It took another 3 days to
Document the (somewhat chaotic) workflow.
Create this Substack post.
Conclusion: The challenges in the AI future for devs: Devs will have to
Have very broad systems knowledge.
Effectively maintain control over the immense power of (unintelligent) AI LLMs (to avoid chaos).
For details see Gdrive docx #431.
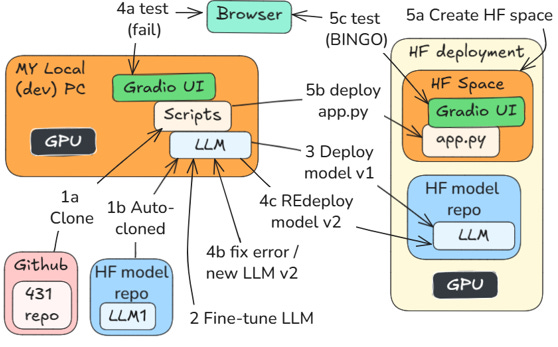
Workflow:
Final result: https://huggingface.co/spaces/terrytaylorbonn/431_smollmv3:
TL;DR ? Go to chapter “Prerequisites”
TOC
Chapters in this post
Terminology
Concepts
Prerequisites
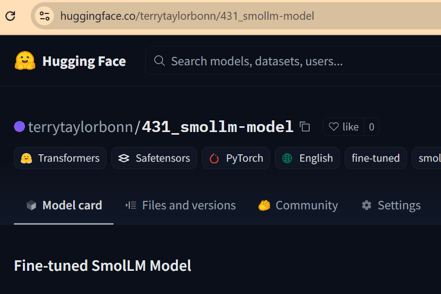
Part 1 Run model locally
Part 2: Fine-tune Model
Part 3: Deploy to HF (model repo)
Part 4: Test Gradio UI local
Part 5: Deploy app.py to HF spaces (code repo) and test
Terminology
In this QS:
CPLT = Copilot (from Microsoft).
Co-pilot = generic term for products like CPLT (usually inside VS Code).
HF “space” = HF repo that contains scripts for user app UI (to use a model).
HF “model” = HF repo that contains model files.
Concepts
C1 Wiki AI LLM stacks / sections 3/4
C2 Working with co-pilots
C3 Workflows
C4 Repos (3 total)
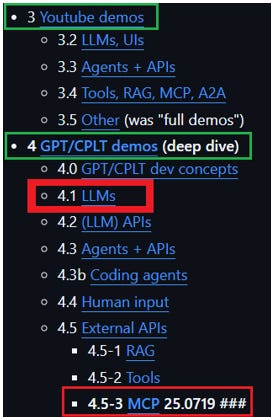
C1 Wiki AI LLM stacks / sections 3/4
See diagram below.
Section 3 “Youtube demos”. I previously I focused on this Wiki section (doing Youtube demos, with the help of AI co-pilots). This was good for getting wide exposure the to the ecosystem.
Section 4 “GPT/CPLT demos”. In July 2025 the focus shifted to this section. These are “clean-slate” demos using only AI co-pilots (ChatGPT or MS Copilot) for assistance. This QS (#431) is the latest of these demos.
C2 Working with co-pilots
C2.1 SW dev has changed. SW (and doc) dev is a much more interesting and productive field to be in. It used to be the main qualifications were knowing (from years of trial and error)
Workflow details
How to solve low-level errors
Product design was secondary (or handed off to someone else). Now the SW dev has much more time for focusing on high level requirements.
C2.2 Tech docs will change. I myself have always preferred to read docs that show the exact setup/steps for specific demos, not a general description with lots of verbiage.
Now with SW dev co-pilots, doc content requirements will change. The reader will be working with a trusted co-pilot and therefore needs short and concise workflow/command instructions. The co-pilot can
Explain the details
Fix errors
Provide context directions for the readers specific configuration
C2.3 SW devs must maintain control over co-pilots. This demo almost got away from me. It only took a day to code (with me struggling to keep up with CPLT), but it took a few days to review what happened and figure out some of the details. If you don’t maintain control (understand the code and keep the co-pilot from doing something wrong or overly complex), then you quickly lose control of your project (and it will fail). Co-pilots have no intelligence and are not qualified to be pilots.
C3 Workflows
The following shows the workflows in this QS. Note:
(4) = command (4) in this QS post
“CPLT17” = CPLT prompt 17 (the instructions Copilot gave me)
It’s a bit complicated, because there was an error in step 3. I need to redo this entire demo again without that error and verify.
The 5 parts of this QS are shown in in the diagram below:
Part 1 Run model locally
1a Clone (from github) the #431 repo (4) CPLT17.
1b Auto-cloned (from HF model repo) LLM model (11, 12, 14) CPLT18
(auto-cloned when Python scripts run).
Part 2 Fine-tune LLM (15) CPLT18.
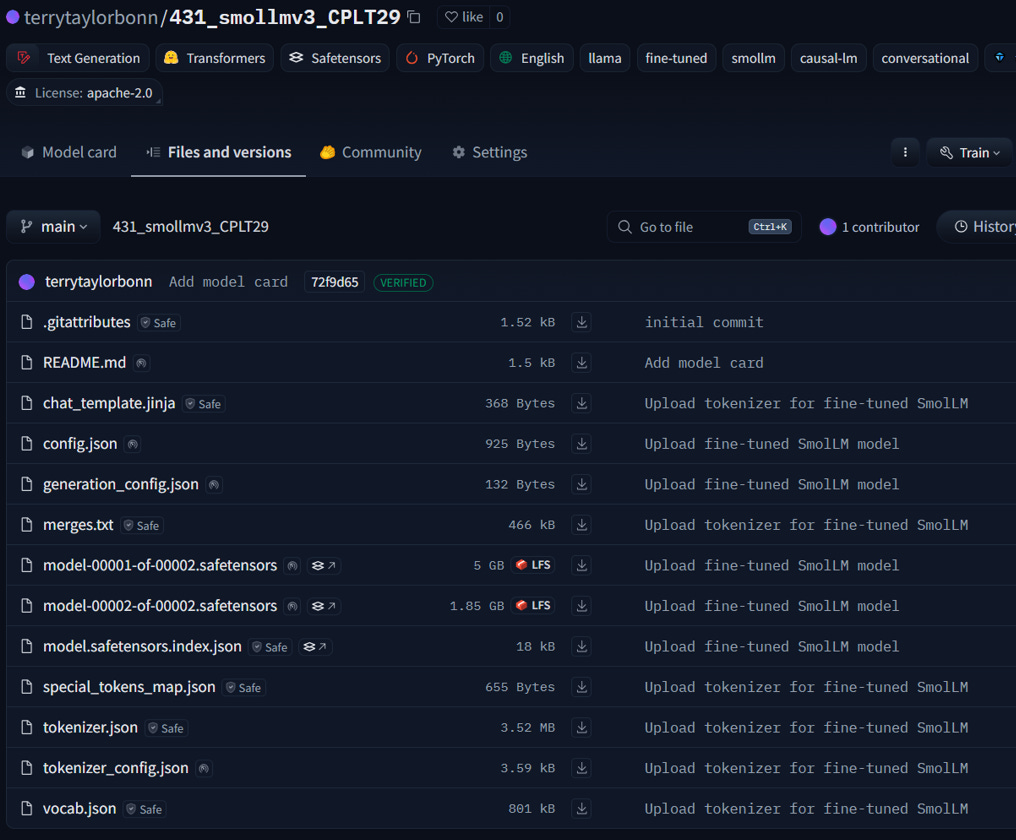
Part 3 Deploy the model to HF model repo (16-23) CPLT19-CPLT20. Note: The model had an error (discovered and fixed in part 4).
Part 4
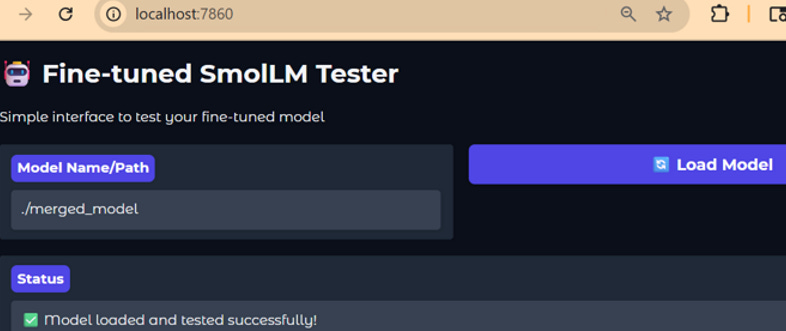
4a Test Gradio (HF meta tensor error) (24) CPLT21.
4b Fix error and test locally (25-27) CPLT22-CPLT28.
4c Redeploy v2 (model_CPLT29) to HF model repo (28) CPLT29.
Part 5
5a Create space (HF app code repo),
5b Deploy app.py,
5c Test (29-37) CPLT30-CPLT34 (BINGO).
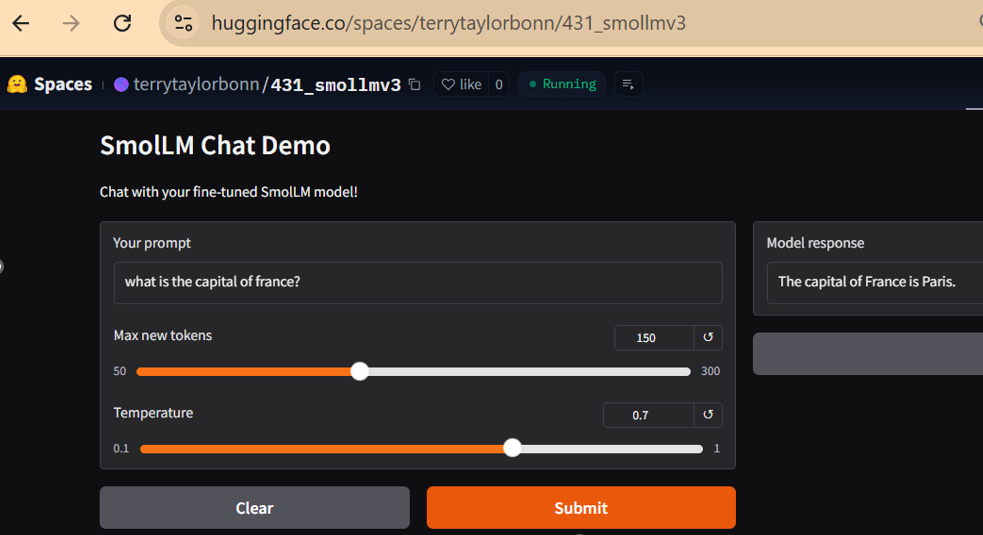
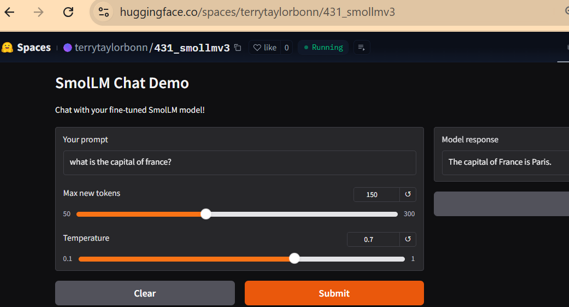
The following shows the final successful test.
https://huggingface.co/spaces/terrytaylorbonn/431_smollmv3
C4 Repos (3 total)
See chapters 11 and 12 “C4 Repos” in #431 for more details.
There are 3 repos
R1 GITHUB (python dev)
R2 HF LLM model files
R3 HF SPACE (app.py and final user UI)
The HF website takes a while to get used to.
Its important to keep clear the distinction between
R2 HF model
R3 HFspace
Prerequisites
CPLT17
(1) Microsoft Copilot (or other co-pilot)
You have access to my repo. But there are always errors when setting this up. Your chances for success are vastly better with a co-pilot to fix the errors.
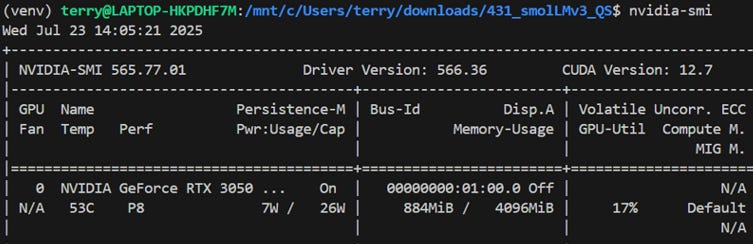
(2) nvidia-smi (verify GPU)
Verify this first. If your GPU not working, it could take a long time to fix (install different drivers, CUDA chaos, etc). You need
NVIDIA GPU (4GB+ VRAM recommended)
Windows 11 + WSL2 or Linux
CUDA 12.0+
Python 3.10+
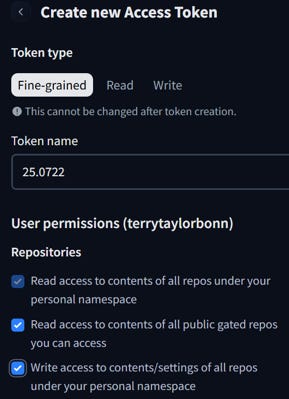
(3) Create a HF (HuggingFace) account and token with these permissions
Part 1 Run model locally
CPLT17
(4) git clone https://github.com/terrytaylorbonn/431_smolLMv3 431_smolLMv3_QS
(5) cd 431_smolLMv3_QS
(6) code .

(7) python3 -m venv venv
(8) source venv/bin/activate
CPLT18
(9) pip3 install -r requirements.txt (REQUIRED 40mins!)
torch>=2.0.0
transformers>=4.40.0
accelerate>=0.20.0
bitsandbytes>=0.41.0
(10) python3 -c "import torch; print(torch.cuda.is_available())"
Took 30 secs.

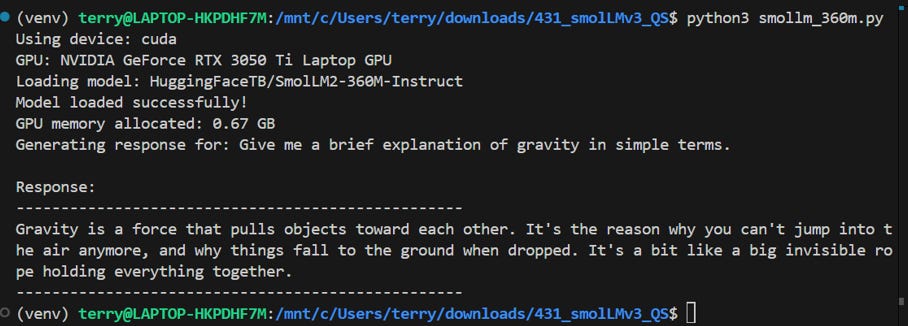
(11) python3 smollm_360m.py
Took about 2 mins.
(12) python3 smollm3_simple.py
Took about 2 mins.
About is basically identical.
Part 2: Fine-tune Model
(13) pip3 install -r requirements_finetuning.txt
peft>=0.7.0
datasets>=2.14.0
evaluate>=0.4.0
scikit-learn>=1.3.0
Took 12 mins.
(14) python3 fine_tune_smollm.py
This only took 4 mins. The tuning in this example is just going thru the motions). **Expected**: Training loss decreases from ~3.7 to ~3.1 over 3 epochs.
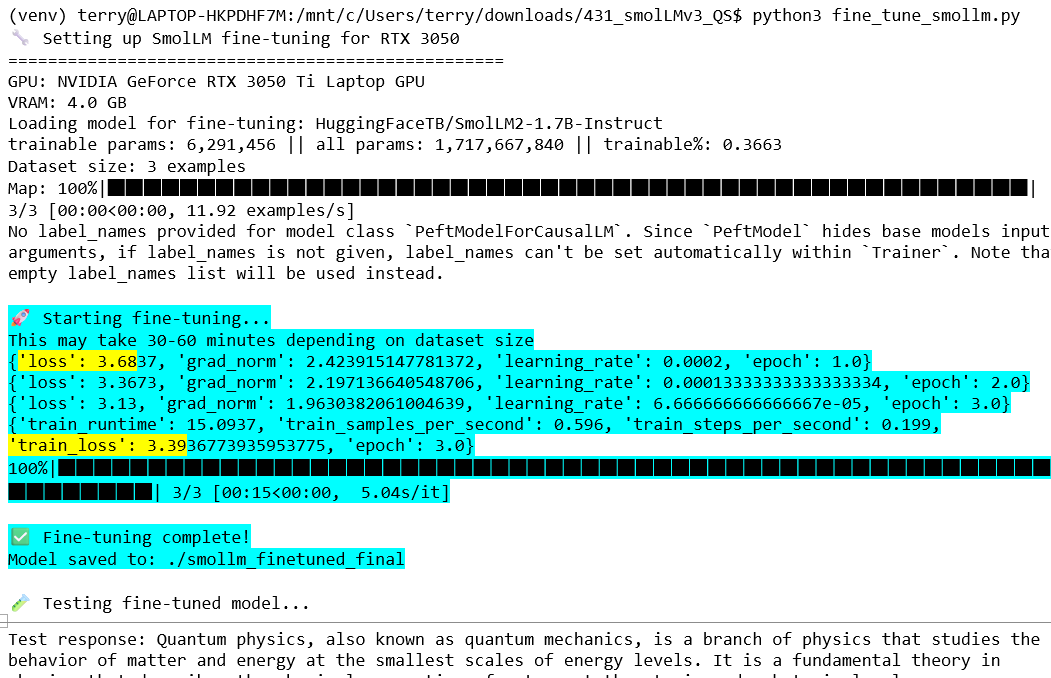
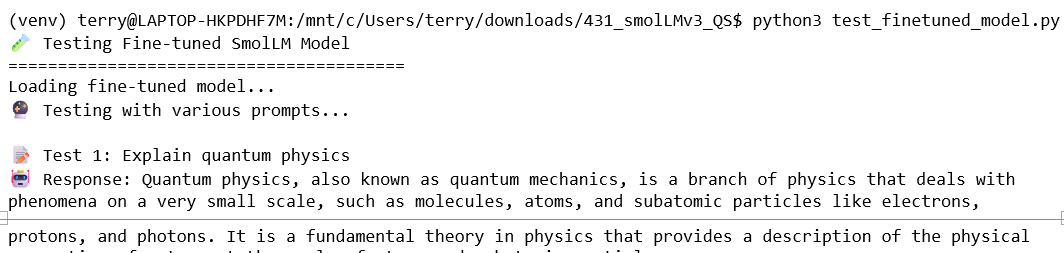
(15) python3 test_finetuned_model.py
Took 10 mins
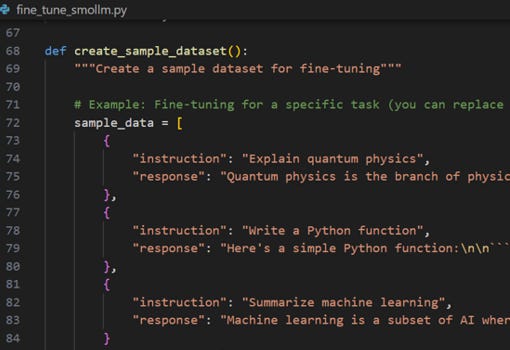
NOTE: I did not add sample data (I forgot!). You should probably do this to verify.
Part 3: Deploy to HF (model repo)
CPLT19-CPLT20
(16) git config –global credential.helper store
(17) git config –global get credential.helper store
(18) python3 deplo_to_hf.py
(19) Enter repo name: 431_smollm-model
(20) N
(21) Enter token
Note: Be careful when entering the token. Do this:
CTRL-C the token,
Right-click into the entry location, then
CTRL-V to copy.
(22) Y
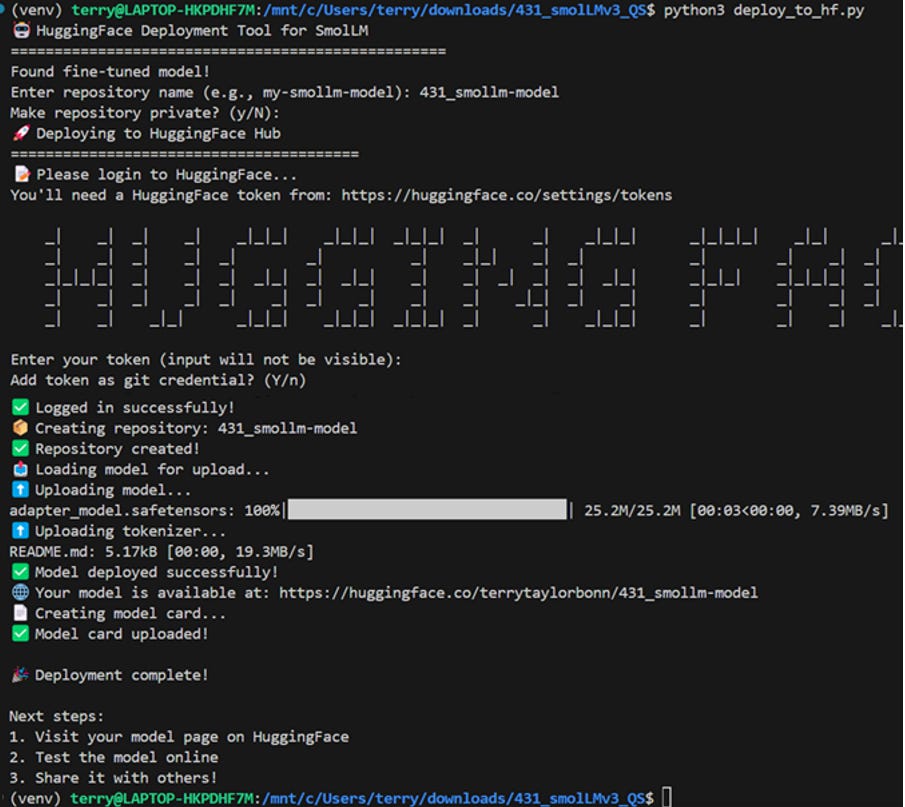
(23) Open the HF model repo URL
Part 4: Test Gradio UI local
(GRADIO FAIL / MODEL MERGED / REPLOY TO HF)
CPLT21
(24) Create script files (see GIT REPO)
A simple Gradio interface gradio_demo.py
Requirements file for the Gradio demo: requirements_gradio.txt.
(25) pip install -r requirements_gradio.txt
gradio>=4.0.0
torch>=2.0.0
transformers>=4.40.0
accelerate>=0.20.0
CPLT22-CPLT27 Fix the meta tensor error
(26) python3 simple_gradio_demo.py
CPLT28
(27) Load merged_model
(28) Enter prompt (BINGO)
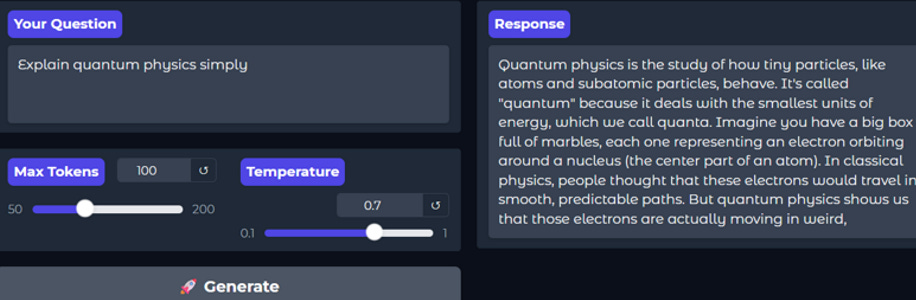
CPLT: “Summary of what we accomplished:”
1 Diagnosed the issue - Your model was a LoRA/PEFT model that needed special loading
2 Created a merged model - Combined base model + your fine-tuning into a standalone model
3 Fixed the Gradio demos - Resolved the dict/input_ids bug
4 Successfully tested online - Your model is generating quality responses
TT29
(29) Redeploy (fixed/merged) model CPLT29 to HF
MODEL CPLT29 https://huggingface.co/terrytaylorbonn/431_smollmv3_CPLT29
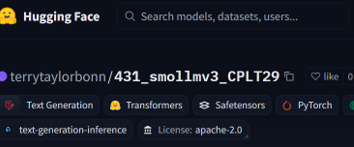
https://huggingface.co/terrytaylorbonn/431_smollmv3_CPLT29/tree/main
Part 5: Deploy app.py to HF spaces (code repo) and test (BINGO BINGO)
CPLT30-CPLT34
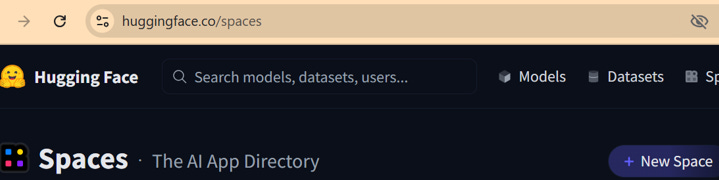
(30) Go to the Spaces Page
(31) Click “Create new Space”
You need to be logged in to your HuggingFace account.
(32) Fill in the details
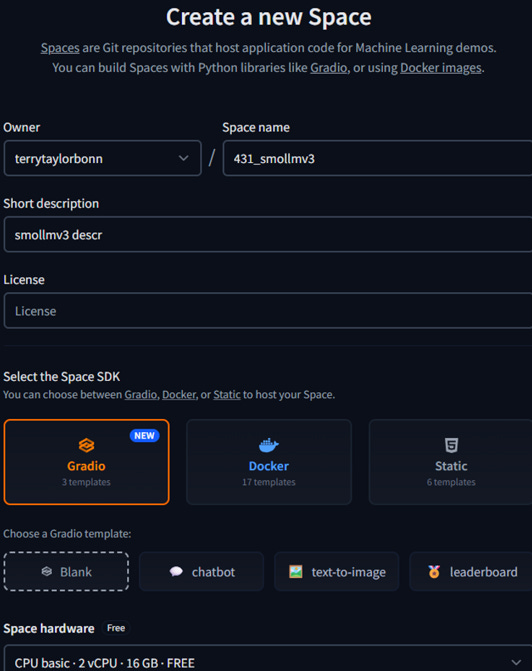
(33) Create the space (repo)
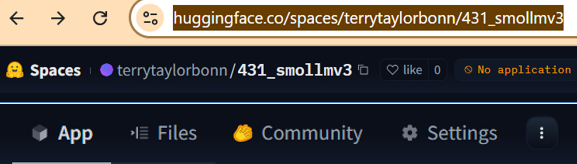
SPACE huggingface.co/spaces/terrytaylorbonn/431_smollmv3
(34) Click “Files and versions” > “Add file” > “Create new file”
(35) Add code for app.py
NOTE:
Do NOT use gradio_demo.py directly—it expects a local model path and may have device logic that’s not ideal for Spaces.
Use the template I provided earlier (or below), which is designed for Spaces and loads your model from the HuggingFace Hub, not from disk.
Ready-to-paste app.py for your Space:
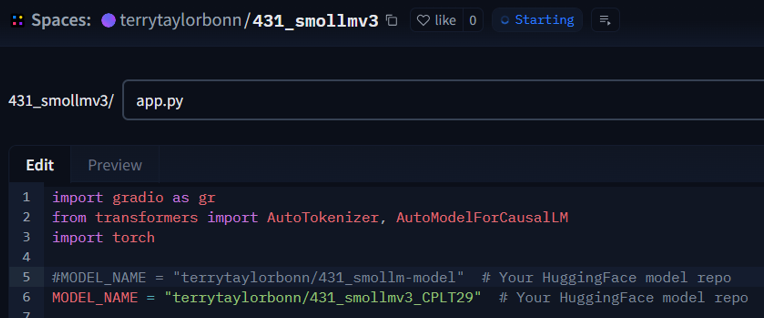
NOTE: Verify app.py HF model repo (see LINE 6) / must match your model repo name
Get the code from #431 (search for “code for app.py”).
→ Paste this as app.py in your Space.
(36) Optional: Add print statements (for debugging)
app.py is available at either of these links (Verify app.py HF model repo (see LINE 6))
https://huggingface.co/spaces/terrytaylorbonn/431_smollmv3/resolve/main/app.py
#431 (search for “app.py with print statements”).
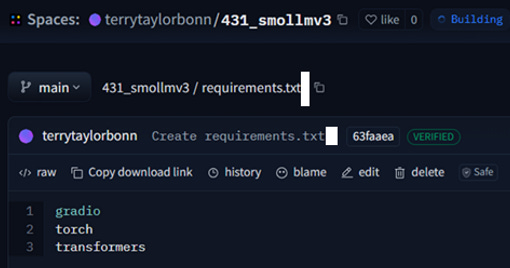
(37) Create requirements.txt
For a HuggingFace Space, you only need the packages required to run the demo, not to fine-tune.
Use the content of requirements_gradio.txt (or just these lines):
gradio
torch
transformers
Do NOT include peft, datasets, or scikit-learn unless your Space needs to fine-tune or evaluate models (which it does not for inference/chat).
(38) Test (BINGO)
https://huggingface.co/spaces/terrytaylorbonn/431_smollmv3
DEMO. ANALYZE. DOCUMENT. REPEAT.